Blog

  • Website Creation Step by Step Process

    Website Creation Step by Step Process

    Website creation involves a series of planned steps that may seem like small and simple steps, but it is really important to follow all the steps properly and execute them perfectly. If there are any problems

    The steps to a perfect website creation are as follows:

    1. Planning:

    Before you start building a website, you need to know why you are building it.

    The purpose of your website is the reason why you want to build it. It’s the somewhat obvious reason for what you think a website can do for you. You might think the purpose is to:

    • Attract traffic and grow an audience.
    • Showcase your products. 
    • Share what you know. 
    • Advertise your business. 
    • Entertain your readers.
    1. Design:

    The design of a website is what attracts people to the website. Whether it is a minimal layout or a highly animated one. Depending on the use of the website and the mindset of the user, the website can look like anything.  

    The designing step of a website starts with the foundational layout of each page of your website being roughly noted or sketched. These foundational layers decide the placement of elements such as headers, images, hero sections, and various other blocks for information.

    It acts as a blueprint that helps the developer visualize the structure of your website and start with the creation.

    1. Development:

    The development step of the website is the most important part of website creation, as this is the step in which the whole website is built.

    In the current day and age, a website is not built with just computer layout in mind. It is built with every possible screen size in mind, from smartphones to laptops and even the big sized monitors.

    Developing is not just about creating a website that is optimized for all screen sizes. It is also about the speed, or the time taken by the website to load. The speed of a website is very important for search engines like Google or Safari when determining a website’s rank.

    During the development of a website, many things are taken into consideration such as 

    • If the images and videos are of very big sizes, they can cause the website to load slowly if they are not optimized properly.
    •  The files for pages that have been created should be kept in a proper order inside the folders. So that if needed in the future, the folders can be easily navigated.
    1. Testing:

    The testing step of the website creation process is a step that can be done simultaneously with the development of the website, but it should be done even after the development is complete.

    Testing includes checking everything about the website, including: 

    • Testing responsiveness for every screen size.
    • Testing every component or block added. These blocks can vary from a simple text block to a complex block like an infinite menu to display images .
    • Testing or checking if the content added is right/does it align with the purpose of the website? 
    1. Deployment:

    After complete testing of the website is done, we move on to the next step, which is deployment of the website.

    Deployment of a website means making the website visible for everyone on the web/Internet. During this process there are many things that need to be looked over, such as:

    • Check whether the domain you want to use for your website is available and not being used by some other website. You can check this on domain ownership checkers like whoxy.com .
    • Domain is the name people can use to search your website.
    • If the domain name is available, you can buy it and be the owner.
    • You also need a server to host  the website.
    • After you have these necessary things in your possession, you can go ahead with the deployment of the website.

    To deploy your website in the older days, you had to go through complex steps; now you can use deployment tools like Vercel, where you connect your GitHub account and make the website live first on the domain provided by Vercel for free.
    Then use the domain that you want the world to use and add your custom domain at the dashboard.Then update the DNS settings at your domain registrar to point to Vercel’s servers.

    The deployment is done.

    1. Maintenance:

    Maintenance is the step that is done only if needed. If all the steps before are followed perfectly, then there will be a rare need for this step.

    If the testing phase of the website was done perfectly, then maintenance will only be needed if you want to change or update your content. 

    These were the steps that can be used as your guide through website creation and make your work a lot easier than you would have expected.

  • WordPress Page Builders: Features and Drawbacks Explained

    WordPress Page Builders: Features and Drawbacks Explained

    WordPress is one of the most commonly used tools for creating online stores, portfolios, and any type of website. This is so because it is free to use, open source, has an easy-to-use interface, and has a wide range of themes and plugins that result in seamless customization, scalability, and efficient website management for users of all skill levels.

    WordPress has many page builders in its interface to help you build the perfect website that you require without needing to write a single line of code, making it accessible for beginners while still offering advanced features for developers.

    WordPress, while popular, has drawbacks including security vulnerabilities due to its open-source nature and popularity, potential for performance issues with heavy plugins and themes, and the need for ongoing maintenance and updates.

    Some of these drawbacks can be overlooked because of all the help you get by using its various page builders like Elementor, WPBakery, SeedProd, Brizy, and many more.

    Top page builder that can be used for easy website building

    1. Elementor

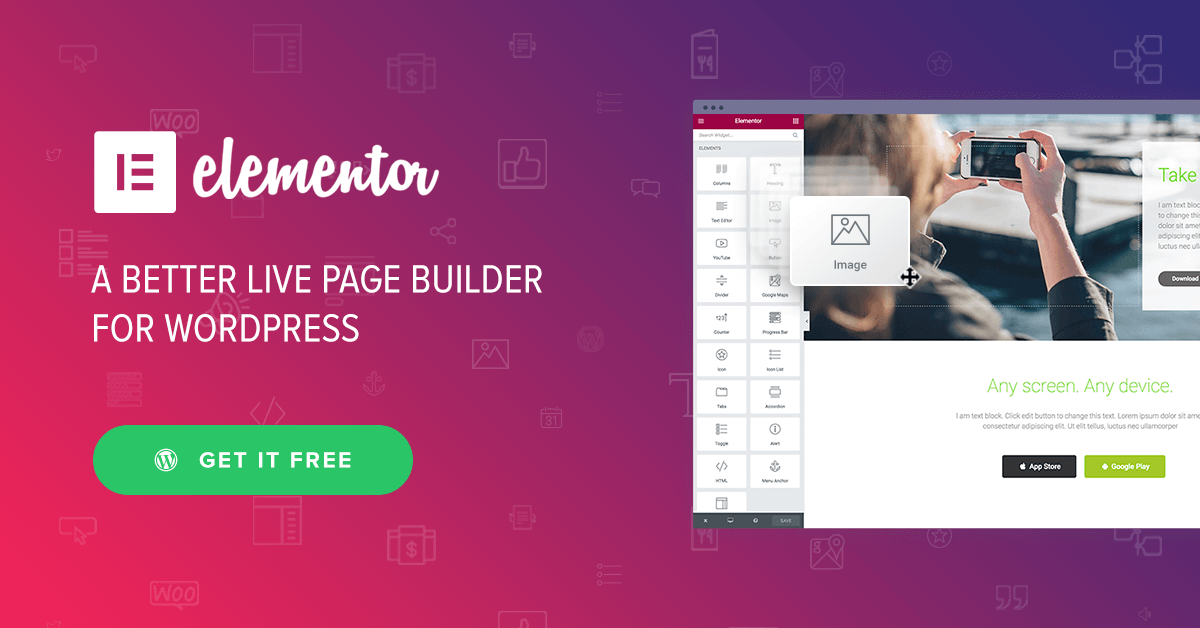
    Elementor is one of the most popular WordPress page builders, having over ten million active installations.

    The free version of Elementor would be enough for a basic website page. In case you require a high-end web page, it also provides various components in its paid version that make the page look stunning!!

    A few key features of Elementor are:

    • Drag & Drop Editor – Build every part of your website visually. Simply drag, drop and customize without writing a single line of code.
    • 300+ Designer Made Templates – Choose a beautifully crafted template designed to fit every industry and need. It is always responsive and fully customizable.
    • Responsive Editing – Adjust your website to make it look perfect on every screen and design for up to 7 devices.

    A few drawbacks of Elementor are: 

    • Slow Load Times: – Elementor’s JavaScript-heavy nature and the addition of widgets and add-ons can significantly increase page load times.
    • Compatibility Issues – Elementor can sometimes conflict with other plugins or themes, leading to errors or broken functionality.
    • No Going Back – Elementor once integrated with the website, can not be removed. If removed, the website will break and will have to be built again.
    1. WPBakery

    WPBakery, while also being one of the most popular WordPress page builders, having over four million active installations, is simply an overly complicated and not so easy-to-use page builder with both features and flaws that cannot be overlooked.

    There is no free version of WPBakery, only a premium version that can be installed after completing the payment of $69. This is the only payment that needs to be made for a lifetime license of the page builder (mentioned on their website).

    From a personal experience, the payment of $69 is not worth it as compared to other page builders that provide basic functionality for free and even better experiences for a better price.

    A few key features of WPBakery are: 

    • Wide range of design and theme templates – WPBakery provides a vast library of design elements and pre-built templates, streamlining the design process and allowing users to quickly create professional-looking pages.
    • Responsive Design – Ensure your website looks great on any device with responsive design capabilities.
    • SEO Toolkit – You can boost your website’s search engine ranking with built-in SEO features.

    A few drawbacks of WPBakery are: 

    • Steeper learning curve – WPBakery can be more challenging for beginners compared to some other page builders, such as Elementor, due to its complex interface and reliance on shortcodes.
    • Lack of inline editing – The absence of inline editing and right-click functionality can make editing and customizing page elements less convenient.
    • Performance issues with complex layouts – WPBakery’s performance can be affected by complex layouts, especially when combined with multiple plugins, potentially leading to slower page loading times.
    1. Beaver Builder

    Beaver Builder is a powerful website builder that can be used to create any type of website, including blogs, eCommerce stores, and membership sites.

    According to some research, Beaver Builder might just be the best drag and drop WordPress page builder plugin on the market. Same as Elementor, Beaver Builder offers a free version, along with several premium plans for users who need more advanced features.

    While it does not have a dedicated SEO plugin, it can indirectly help improve your site’s SEO by offering flexibility and tools for building SEO-friendly content and layouts.

    A few key features of Beaver Builder are: 

    • Pre-built templates and layouts – The plugin offers a variety of templates and layouts to get users started quickly and easily.
    • SEO-friendly – The plugin is designed to be SEO-friendly, ensuring that websites built with it are easily indexed by search engines.
    • User access control – The plugin allows developers to control which users have access to the page builder and which modules they can edit.

    A few Drawbacks of Beaver Builder are: 

    • Compatibility Issues – Conflicts can arise between Beaver Builder and other plugins or theme updates, potentially affecting its functionality.
    • Limited Advanced Features – Beaver Builder may lack some advanced features found in other page builders, such as global design templating.
    • Lacks animations – Beaver Builder does provide animations for its components but lacks in comparison to its competitors.
    1. Visual Composer

    Visual Composer Website Builder is a live frontend drag and drop editor for WordPress that allows you to design pages and manage content.

    Just like Beaver Builder, Visual Composer is also considered one of the best drag and drop page builders, but for developers and agencies needing precision, Visual Composer’s backend/frontend hybrid editor bridges gaps that Beaver Builder’s streamlined approach can’t—proving ‘simplest’ isn’t always ‘best’ for every workflow.

    Its pricing starts the same as Elementor and Beaver Builder, with it being free for use for basic needs, and for more complex use, you may need to use its premium version.

    A few key features of Beaver Builder are: 

    • Element lock – you can restrict element editing for specific user roles.
    • Unsplash and GIPHY integration – these visual libraries give you easy access to numerous stock images and GIFs to feature on your page.
    • Name your elements – Change default element names to navigate across your layout quickly.

    A few drawbacks of Beaver Builder are: 

    • Performance – Visual Composer can significantly impact page load times, especially when using numerous add-ons or complex elements. This can negatively affect user experience and SEO, as search engines prioritize faster-loading websites.
    • Stability Issues – Updates to Visual Composer might not always preserve the integrity of existing layouts and designs. This can lead to unexpected changes or issues with previously functional elements.
    • Integration Challenges – While Visual Composer is generally compatible with many themes and plugins, it can sometimes make it difficult to integrate other tools or services into a website.
    1. Oxygen

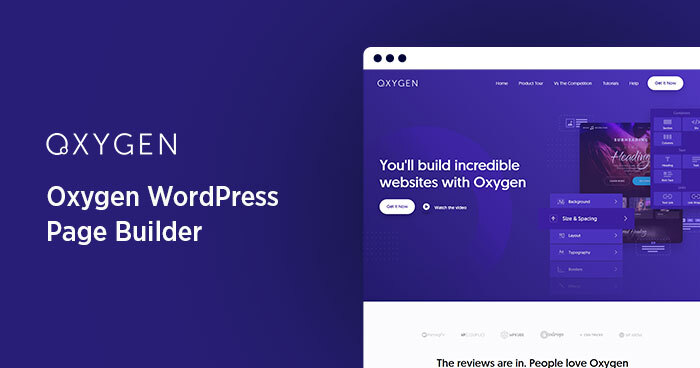
    Oxygen acts as a visual site builder, allowing users to design and customize their websites with a drag-and-drop interface.

    You can tweak your site components to the code level, as Oxygen supports HTML, CSS, JavaScript, and even PHP customization. Even better, the interface lets you preview the output of your code directly.

    Oxygen does not have a free version; it only provides a single plan that is a lifetime license for $199.50 (currently) 

    A few key features of Beaver Builder are: 

    • Dynamic Content – Displaying dynamic content from sources like blogs, stores, or other databases is easy with Oxygen’s Dynamic Data features.
    • Advanced Queries – Use advanced query syntax to create more complex and useful search results.
    • Oxygen and Gutenberg Editor Integration – Oxygen works seamlessly with the Gutenberg editor, allowing you to build entire sites or create custom elements within the Gutenberg environment.

    A few Drawbacks of Beaver Builder are: 

    • Steep Learning Curve – Oxygen Builder’s advanced features and developer-centric approach can be overwhelming for users new to WordPress or page builders.
    • Complex UI – The user interface might be more complex than some other builders, making it less intuitive for non-developers.
    • Not Client-Friendly – Some users find Oxygen Builder less client-friendly than other page builders due to its advanced features and potential for complex customizations.

    Which WordPress page builder should you choose? 

    The WordPress page builder that you should choose depends on the type of website or page you want to create.

    If you just want basic blog pages or a basic landing page, then Elementor is the best choice for you because its free version is good enough for blogs and basic use while also being easy to learn. 

    If you want to develop a complete website and need complex coding to make your website go to the next level, then you can use Oxygen page builder because it allows you to change your components on the code level.

  • From Solving a Pain Point to Building a Multimillion-Dollar Company 

    From Solving a Pain Point to Building a Multimillion-Dollar Company 

    Behind every successful startup, there is a simple truth: Great businesses don’t just sell products; they solve painful problems. 

    Every successful business starts with identifying a real problem and offering a solution that people are willing to pay for. Some of India’s most prominent startups, like OYO, Zerodha, Zomato, and Paytm, began by addressing everyday pain points and scaled into multimillion-dollar companies.

    Identifying a Day-to-Day Life Problem

    OYO – Ritesh Agarwal solved the poor hotel quality and experience for travelers.

    Zomato – Deepinder Goyal addressed the challenge of discovering restaurants, menus, and food delivery.  

    Paytm – Vijay Shekhar Sharma tackled cash scarcity during India’s demonetization in 2016. 

    Zerodha – Nithin and Nikhil Kamath simplified stock market trading with low-cost, transparent platforms.

    Cred – Kunal Shah made credit card payments easier while offering rewards. 

    Urban Company – Founders solved the problem of finding trusted, high-quality home services.

    Swiggy – Sriharsha Majety and Nandan Reddy streamlined food delivery with real-time tracking and reliability.

    Byju’s – Byju Raveendran revolutionized education with engaging, personalized online learning. 

    PharmEasy – Dharmil Sheth and Dhaval Shah simplified medicine delivery and healthcare access.

    Meesho – Vidit Aatrey and Sanjeev Barnwal empowered small businesses with social commerce. 

    They observed everyday frustrations of their own or others and asked “Is this a big enough problem that people would pay for a solution?”  

     Validating the Problem

    Many startups fail because they assume demand exists. Smart founders validate before investing heavily.  

     How to Test Your Idea:

    1. Talk to potential customers (surveys, interviews).

    2. Build an MVP (Minimum Viable Product) – The simplest version of your solution. 

    Observe behaviour – Do people use and pay for it?

     Example: How OYO Validated Its Model

    – Ritesh Agarwal stayed in 100+ budget hotels to analyze the problems.

    – He started with just one hotel to test.

    – Only after proving the demand, he scaled.

     Example: How Swiggy Validated Its Model

    – Started with hyper-local delivery in Bangalore.

    – Tested demand with a small team and limited restaurants.

    – Expanded only after proving reliability and customer retention.

     Scaling the Business

    Once validated, scaling requires:

    Strong Unit Economics – Each customer should be profitable.

    Tech & Automation – Manual processes don’t scale (e.g., Zomato’s app replaced phone calls). 

    Funding (If Needed) – OYO raised $3B+, but only after proving traction.

     Example: Zomato’s Scaling Strategy

    – Started as a restaurant discovery platform.

    – Expanded into food delivery, subscriptions (Zomato Pro), and cloud kitchens.

    – Acquired competitors (like Uber Eats India) to dominate the market.

     Example: Byju’s Scaling Strategy

    – Began with offline coaching.

    – Pivoted to online learning with interactive videos.

    – Acquired competitors (like Aakash) to dominate edtech.

     Monetisation Strategies

    Solving a problem is great, but how do you make money?

    Commission Model – OYO takes a cut from hotel bookings.

    Subscription – Zomato Pro, Byju’s Premium.

    Advertising – Zomato charges restaurants for better visibility. 

    Freemium Upselling – Paytm offers free payments but sells loans, insurance, etc.

    Marketplace Fees – Meesho earns from seller commissions.

    Most importantly, your monetization model must align with customer behavior.

     Key Lessons from India’s Top Startups

    1. OYO’s Success (& Challenges)

       – Solved a real problem: Standardized budget hotels.

       – Scaled aggressively: Expanded to 80+ countries.

       – Learnings: Overexpansion without strong unit economics can lead to losses.

    2. Paytm: How a Crisis Created an Opportunity

       – Pivoted during demonetisation – Became India’s 1 digital wallet.

       – Diversified early – Added banking, investments, and e-commerce.

    3. Meesho: Leveraging Social Commerce

       – Empowered small sellers via WhatsApp and Facebook.

       – Proved demand in Tier 2/3 cities before scaling.

    4. PharmEasy: Solving Healthcare Access

       – Started with medicine delivery, expanded to diagnostics.

       – Focused on unit economics before scaling.

     Step-by-Step Framework for Your Startup 

    1. Find a problem – One you’ve personally struggled with. 

    2. Validate demand – Talk to users, build an MVP. 

    3. Monetize early – Don’t wait for “scale first, profit later.” 

    4. Scale smart – Avoid burning cash on unsustainable growth. 

    5. Adapt constantly – Like Paytm did during demonetization or Swiggy with cloud kitchens.

     Final Thought

    The next big startup won’t come from copying others; it’ll come from deeply understanding an unsolved pain point and executing better than anyone else. 

  • Power of Minimalism in Modern Web Design

    Power of Minimalism in Modern Web Design

    What is Minimalism?

    A movement or an ideation that focuses on removing excess information and focuses more on abstract expressionism, bringing in information which is simple, intentional and adds value.It is a life that forces intentionality upon us. As a result, it forces improvements in almost all aspects of your life. 

    Being a minimalist also means intentionally promoting the things we most value and removing everything that distracts us from it.

    Psychology Behind Minimalism

    While minimalism enhances clarity and simplicity, it leverages psychological principles enhancing engagement by clear focus, fostering calmness and seamless interactions. 

    I am sure once in a while you might have come across a website, which is just cluttered with too many texts, too many fonts used, you can see a whole colour palette used in that one website, no spacing and just too overwhelming which often creates a sense of discomfort just by scrolling through it.

    Minimalism reduces all these discomfort, creating a sense of calmness, direct answers for your search, spaces to understand better and focus just on the core content. While it makes the design look more aesthetic, it also promotes “less is more”. 

    Psychologically it looks different for everybody, as no two individuals are the same, but it requires each of us to dive deeper and become more aware about our values and passions.

    Minimalism and Web Design: How are they Interlinked

    Minimalism and web design go hand in hand, not just because it looks clean but also because when done right, a minimalist design makes your website look easy to use, easy to acquire knowledge and easier to be appreciated by a client. 

    Minimalism is a popular strategy in the digital field. It’s about stripping away the unnecessary elements and keeping only what really matters. No distractions, no overwhelming layouts, just a smooth, clean and focused experience that helps users find what they need without thinking twice.

    Minimalist design isn’t about having less content, it’s about being intentional. Every element has a purpose. This results in faster load times, better performance, and a website that feels calm, clear, and user-friendly, because on the web, less isn’t just more, it’s an experience.

    How to implement Minimalism in your your Website

    If you’re building a website and want it to look clean and easy to use, minimal design is the way to go. 

    The first rule? Don’t add too much stuff. Only keep what people really need to see. Leave plenty of space between things so it doesn’t feel packed or messy. Choose just two or three colors and use them the same way on every page. Pick a font that’s easy to read—nothing too fancy or hard to understand. Make buttons big and clear so people know where to click. Don’t use too many fonts or colours. Keep the menu simple. Don’t add too many options or people might get confused. Use big, clear headings to break up the text and make it easier to read. If you’re using images, just use one or two that really fit the message—don’t overload the page. 

    Always check how the site looks on both computers and phones. People use both, so it needs to work well everywhere. And most importantly—keep the style the same on every page. Same colors, same fonts, same button style. That way, everything feels smooth and connected. Minimal design isn’t about being boring—it’s about making the website feel calm, clear, and easy to use.

    Future of Minimalism in Web Design

    Minimalism in web design isn’t just a phase—it’s the way forward. People are done with websites that feel crowded, confusing, and full of random stuff. Too many buttons, flashy colors, pop-ups, and things moving everywhere just make it hard to focus. When that happens, most users leave. But when a website is clean and simple, it’s easier to use and way more pleasant to look at. That’s why more designers are going for a clean, “less is more” style.

    Looking forward, websites will continue getting simpler, faster, and smarter. Without all the extra clutter, pages will load quicker and work better on phones and smaller screens. Navigation will be easier, and users won’t need to think too hard to find what they need—it’ll just make sense.

    Design will lean into soft colors, basic shapes, and lots of white space. But don’t worry, that doesn’t mean it’s boring. It means modern, calm, and user-friendly. The focus will shift to what matters most: the content and helping users get things done.

    As tech like voice search and AI grows, minimalism will help keep websites easy for everyone to use—no stress, no confusion. The future is clear, simple, and easy to click through.

    Conclusion

    Minimalism in web design is not just about making a site look clean or pretty. It’s really about making it easy to use and understand. When you keep only the important stuff and get rid of all the extra junk, everything feels more calm and clear. People can actually find what they’re looking for without getting confused or stressed. That’s what makes minimalism so powerful—it helps people use a website without feeling lost or annoyed.

    In a world where everyone is super busy and distracted, a simple website is like a breath of fresh air. It loads faster, works better on phones, and just feels nicer to scroll through. And guess what? This is exactly where web design is heading. More and more people want sites that are simple, fast, and easy.

    If you’re making a website, just remember: don’t try to show everything at once. Focus on what matters. Keep it neat, easy to read, and easy to click. Use space, use clear fonts, and stick to just a few colors. That’s what makes a good website.

    At the end of the day, less really is more. And minimalism helps your site do exactly what it’s meant to—without all the noise. 

    In all, what we really mean is, your life is already messy but your web design doesn’t have to be.